
Canning Collard Greens: A Comprehensive Guide
Introduction to Canning Collard Greens
Canning is an age-old method of food preservation that involves processing food in closed containers to extend its shelf life. When it comes to collard greens, canning allows you to enjoy this nutritious vegetable year-round.
Overview of Canning Collard Greens
Additionally , Collard greens are a nutrient-rich vegetable, high in vitamins A, C, and K, as well as fiber and iron. Canning these greens is a great way to:
- Preserve their nutritional value
- Extend their shelf life
- Have ready-to-use greens available at any time
Benefits of Canning Greens
- Long-Term Storage: Properly canned collard greens can last for years.
- Nutrient Retention: Canning preserves most of the nutrients in collard greens.
- Convenience: Canned collard greens are pre-cooked and ready to eat or add to recipes.
Selecting and Preparing Collard Greens
The key to great canned collard greens starts with the selection and preparation of the greens.
- Choosing Fresh Greens: Look for vibrant, green leaves without any yellowing or wilting.
- Cleaning and Preparation Tips: Rinse the greens thoroughly to remove dirt. Trim away tough stems and chop the leaves.
Detailed Ingredients for Canning Collard Greens
To successfully can collard greens, you’ll need the following ingredients:
- Fresh Collard Greens: Approximately 28 pounds for 7 quart jars or 18 pounds for 9 pint jars. Ensure the greens are fresh, vibrant, and free from blemishes.
- Canning Salt: Optional, but it can be added for flavor. Use about 1 teaspoon per quart jar.
- Water: Enough to blanch the greens and to fill the jars. The water should be clean and preferably filtered.
Directions for Canning Collard Greens
- Prepare the Greens: Start by thoroughly washing the collard greens to remove any dirt or debris. Trim off the tough stems and roughly chop the leaves into smaller, manageable pieces.
- Blanch the Greens: Bring a large pot of water to a boil. Blanch the collard greens in batches for about 3-5 minutes. This step is crucial as it helps to preserve the color, flavor, and nutrients of the greens.
- Prepare the Canning Jars: While blanching the greens, start sterilizing your canning jars and lids. You can do this by boiling them in water or using a dishwasher with a sterilize setting.
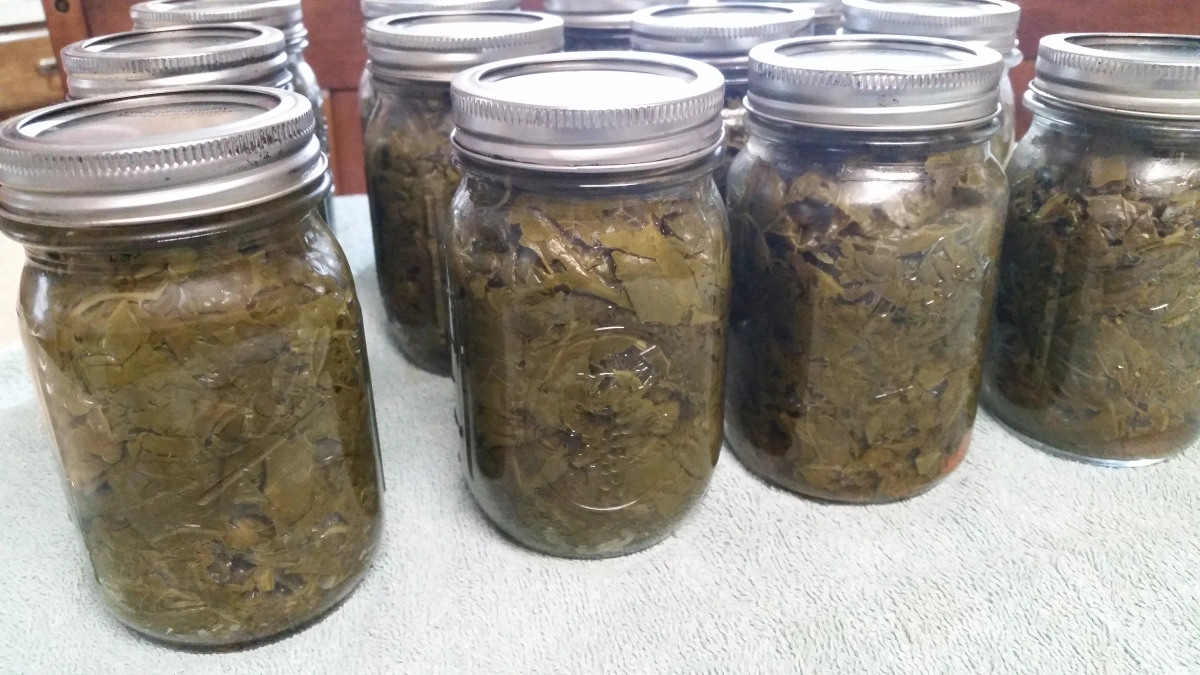
- Pack the Jars: Once the greens are blanched, immediately pack them into the hot, sterilized jars. If you’re using canning salt, sprinkle it over the greens before packing. Compress the greens into the jars, leaving about 1-inch headspace.
- Fill the Jars with Boiling Water: Pour boiling water over the greens in the jars, maintaining the 1-inch headspace. Use a bubble remover or a non-metallic spatula to remove any air bubbles.
- Seal the Jars: Wipe the rims of the jars with a clean cloth to remove any residue or greens. Place the sterilized lids on the jars and screw on the bands until fingertip tight.
- Process the Jars: Place the jars in a pressure canner filled with warm water. Follow your pressure canner’s instructions for processing, which typically involves adjusting the pressure based on your altitude and processing for about 70-90 minutes.
- Cooling and Storage: After processing, turn off the heat and let the pressure canner cool down naturally. Remove the jars using a jar lifter and place them on a towel or cooling rack. Check the seals after 24 hours. Store the jars in a cool, dark place.
Essential Canning Supplies
- A pressure canner or water bath canner
- Canning jars, lids, and rings
- Jar lifter and canning funnel
- Clean cloths and a ladle
Step-by-Step Canning Process
- Blanching the Greens: Blanch collard greens in boiling water for a few minutes to stop enzymatic action.
- Packing the Jars: Pack the blanched greens into canning jars, leaving appropriate headspace.
- Adding Liquids and Seasonings: Cover the greens with boiling water or a seasoned broth, maintaining the headspace.
- Sealing and Processing: Wipe the jar rims, apply lids and rings, and process in a pressure canner according to USDA guidelines.
Pressure Canning vs. Water Bath Canning
- Pressure Canning: Ideal for low-acid foods like collard greens. It reaches higher temperatures than water bath canning.
- Water Bath Canning: Suitable for high-acid foods and not recommended for collard greens.
Safety Tips and Best Practices
- Always follow USDA guidelines for canning to ensure food safety.
- Use a pressure canner for collard greens to prevent the risk of foodborne illnesses.
- Avoid overfilling jars and ensure they are sealed correctly.
Storing and Shelf Life
- Store canned collard greens in a cool, dark place.
- When stored properly, canned collard greens can last for up to 2 years.
Serving Suggestions and Recipes
- As a side dish, seasoned with garlic and olive oil
- In soups and stews for added nutrition
- Mixed with other vegetables for a healthy stir-fry
FAQs
- How long do I process collard greens in a pressure canner?
- Process for 70-90 minutes, depending on jar size and altitude.
- Can I add seasonings to the jars before canning?
- Yes, you can add salt or other seasonings, but it’s optional.
- Is it safe to can collard greens in a water bath canner?
- No, collard greens should be canned using a pressure canner for safety.
In conclusion, canning collard greens is more than just a recipe; it’s a testament to the resilience and ingenuity of traditional cooking methods. As you savor your home-canned greens, remember that you’re partaking in a ritual as old as the classic Nestle Toll House cookie recipe – a ritual that brings families together and celebrates the bounty of our gardens and farms. For more culinary adventures and timeless recipes, explore the diverse and rich flavors offered at oatsrecipes.com, like the unique chicken of the woods recipes, and continue to expand your home cooking repertoire.